
Make Money with Google AdSense on WordPress website in 2025. Follow this step-by-step guide to set up ads, ensure compliance, and maximize earnings.
Monetizing a WordPress website with Google AdSense offers a reliable way to generate passive income by displaying targeted ads. In 2025, AdSense remains the largest advertising network, used by over 48 million websites, with a 68% revenue share for publishers, per Showeblogin. This 2,560-word guide provides a step-by-step process to set up AdSense on your WordPress site, ensure compliance with policies, and optimize earnings, all while maintaining SEO best practices for maximum visibility.
What is Google AdSense?
Google AdSense is an advertising program that allows website owners to earn money by displaying ads on their sites. Ads are tailored to your content and audience, using Google’s AI to match ads based on user browsing history. For example, a travel blog might show ads for booking platforms, while a tech site displays ads for software. Publishers earn revenue through a cost-per-click (CPC) model, receiving 68% of the ad revenue, with Google handling billing and ad selection.
In 2025, AdSense’s ease of use and vast advertiser network make it a top choice for WordPress users, per WPBeginner. However, compliance with policies and privacy regulations is critical to avoid account suspension.
Why Use Google AdSense on WordPress?
- Ease of Setup: Plugins like Site Kit simplify integration.
- Passive Income: Earn money from clicks without managing advertisers.
- Scalability: Works for small blogs and large sites alike.
- Targeted Ads: AI-driven ads align with your content, improving relevance.
- Analytics Integration: Track performance via Google Analytics and Site Kit.
Step 1: Sign Up for Google AdSense
To start monetizing, you need an AdSense account. Follow these steps:
- Visit AdSense: Go to adsense.google.com and click “Start now.”
- Provide Details: Enter your website URL, personal information (name, address, phone number), and select whether you’re an individual or business.
- Agree to Terms: Review and accept Google’s AdSense Program Policies.
- Submit Application: Wait for Google to review your site, which typically takes 2–14 days, per Google AdSense Help.
Eligibility Requirements:
- Be at least 18 years old.
- Own a website with original, high-quality content.
- Avoid prohibited content (e.g., adult material, copyrighted content).
- Do not create multiple AdSense accounts for the same site.
Tips for Approval:
- Ensure your site has at least 10–15 pages of unique content.
- Use a custom domain (e.g., yoursite.com, not yoursite.wordpress.com).
- Verify site navigation is user-friendly with tools like AllinOneSEOOnline’s spider simulator.
Step 2: Connect AdSense to Your WordPress Website
Once approved, connect your AdSense account to your WordPress site. The recommended method is using the Site Kit by Google plugin, which integrates AdSense, Analytics, and Search Console.
Using Site Kit
- Install Plugin: In your WordPress dashboard, go to Plugins > Add New, search for “Site Kit by Google,” install, and activate it.
- Set Up: Follow the setup wizard to sign in with your Google account (use the same email as your AdSense account).
- Connect AdSense: In the Site Kit dashboard, select Connected Services > AdSense and follow the prompts to link your account.
- Verify Connection: Site Kit automatically adds the AdSense code to your site’s
<head>section, ensuring ads display across all pages.
Manual Method
If you prefer manual setup:
- Copy the AdSense code from your AdSense dashboard (My ads > Auto ads > Get code).
- In WordPress, go to Appearance > Theme File Editor, locate
header.php, and paste the code between the<head>and</head>tags. - Save changes and request a site review in AdSense.
Note: Manual edits may be overwritten during theme updates. Use a child theme or Site Kit to avoid this issue. Check your site’s health with AllinOneSEOOnline’s server status checker.
Step 3: Place Ads on Your Website
AdSense offers two primary ad placement options: automated and manual.
Automated Ads
- How It Works: Google’s AI analyzes your site and places ads in optimal locations, such as headers, sidebars, or in-content.
- Setup:
- In your AdSense dashboard, go to My ads > Auto ads.
- Enable “Auto ads” and customize formats (e.g., in-page, anchor, vignette).
- Save settings. Changes may take up to an hour to reflect.
- Benefits: Minimal effort, AI-driven optimization.
- Drawbacks: Less control over ad placement, potential for spammy appearance.
Manual Ad Placement
- How It Works: Create specific ad units and place them manually for precise control.
- Setup:
- In AdSense, go to My ads > Ad units > New ad unit.
- Choose a format (e.g., display, in-feed, link).
- Copy the ad code.
- In WordPress:
- Widgets: Add the code to a text widget in Appearance > Widgets.
- Shortcodes: Use a plugin like Advanced Ads to insert ads via shortcodes.
- Theme Files: Paste code directly into theme files (advanced users only).
- Benefits: Full control over ad placement and appearance.
- Drawbacks: Requires more setup time.
Ad Placement Best Practices:
- Place ads above the fold for higher visibility.
- Use in-content ads to blend with your content, increasing clicks.
- Limit ads to 2–3 per page to avoid overwhelming users.
- Test placements with AllinOneSEOOnline’s page speed checker to ensure they don’t slow your site.
| Ad Type | Description | Best Use Case | Tool to Optimize |
|---|---|---|---|
| Auto Ads | AI-driven placement | Quick setup, beginners | Site Kit, AdSense Dashboard |
| Display Ads | Banner-style ads | Sidebars, headers | Advanced Ads, Widgets |
| In-Feed Ads | Ads within content feeds | Blogs, news sites | Shortcodes, Theme Files |
| Link Ads | Text-based ad links | High-traffic pages | Advanced Ads |
Step 4: Ensure Compliance with AdSense Policies and Privacy Regulations
Compliance with Google’s policies and privacy laws is essential to maintain your AdSense account and user trust.
AdSense Policies
- No Invalid Traffic: Avoid clicking your own ads or using bots, as outlined in AllinOneSEOOnline’s invalid traffic guide.
- Original Content: Ensure all content is unique, verified with AllinOneSEOOnline’s plagiarism checker.
- Prohibited Content: Avoid adult, illegal, or copyrighted material.
- Single Account: Use one AdSense account per site.
GDPR and CCPA Compliance
- Consent Notices: Install a plugin like Cookie Notice & Compliance for GDPR/CCPA to display consent banners for users in Europe and California.
- Privacy Policy: Create a privacy policy page stating you use AdSense for ads and cookies for personalization. Use tools like Iubenda or TermsFeed to generate one.
- Implementation:
- In WordPress, go to Plugins > Add New, search for “GDPR Cookie Consent,” install, and activate.
- Configure the plugin to show a consent banner for GDPR and CCPA regions.
- Add a privacy policy page via Pages > Add New and link it in your site’s footer.
Step 5: Set Up Payment Details
To receive earnings, configure your payment settings in AdSense:
- Go to Payments > Manage payment methods in your AdSense dashboard.
- Add your bank account details for wire transfers.
- Verify your address by entering the PIN sent by Google via mail (arrives in 2–4 weeks).
- Ensure your account balance reaches the $100 threshold for monthly payouts.
Step 6: Monitor and Optimize AdSense Performance
Tracking and refining your ad strategy maximizes revenue.
Monitoring Performance
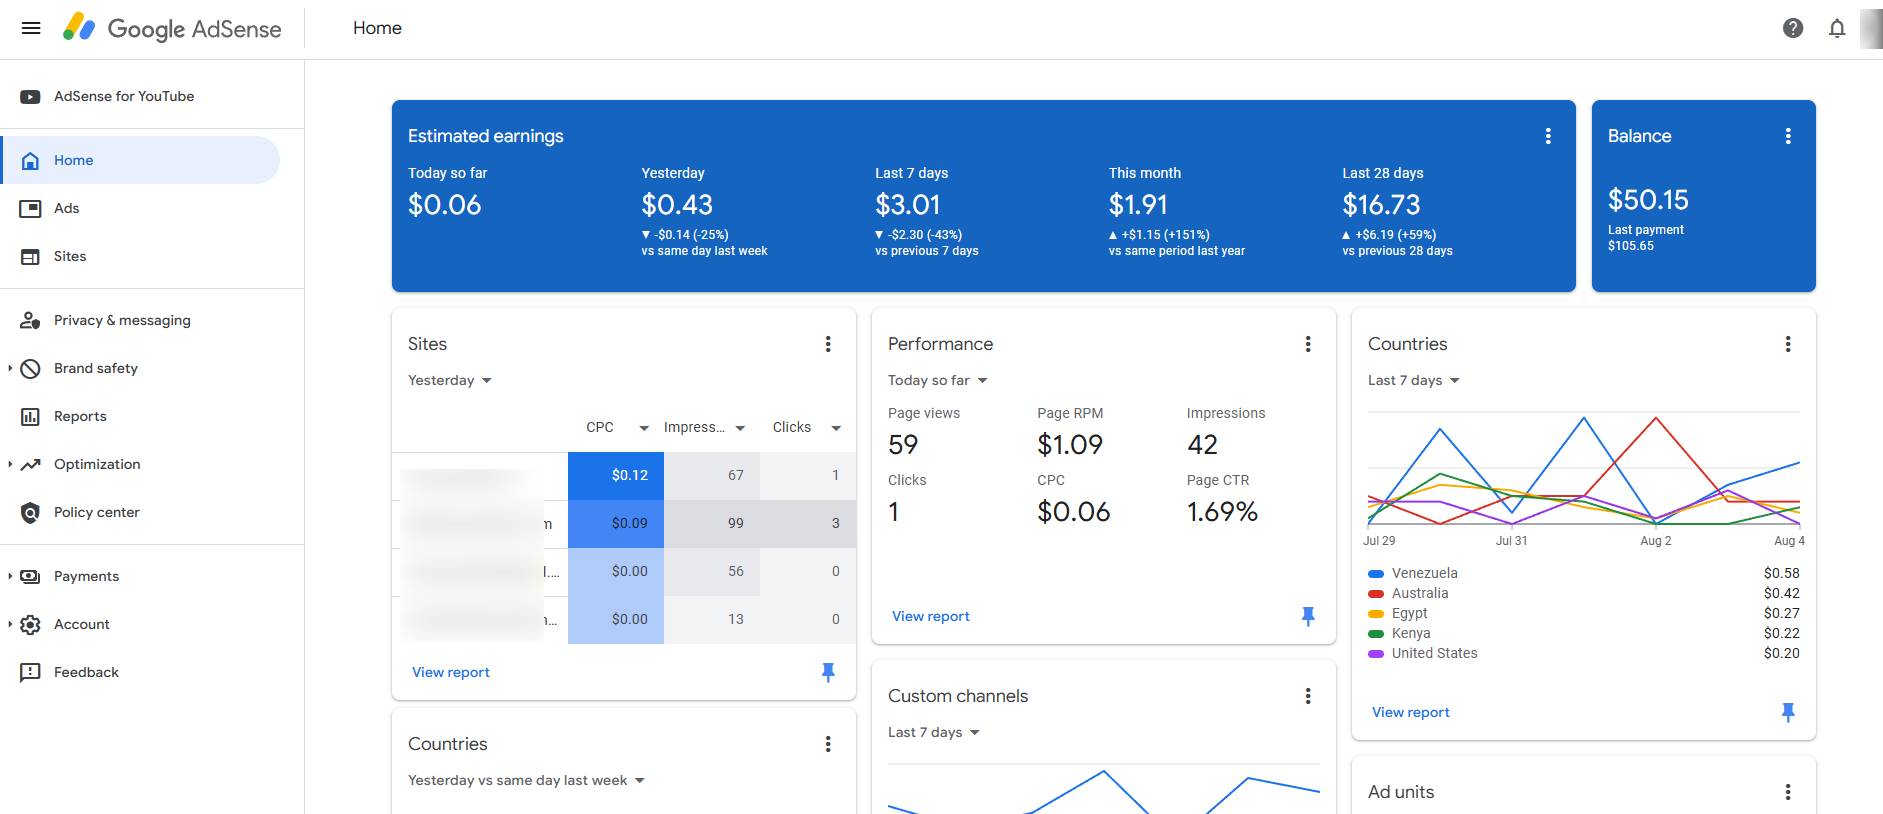
- AdSense Dashboard: View earnings, impressions, clicks, and CTR in Reports.
- Site Kit: Access AdSense data directly in your WordPress dashboard.
- Google Analytics: Integrate via Site Kit to track user behavior and ad performance.
Optimization Strategies
- Experiment with Formats: Test display, in-feed, and link ads to find the best fit.
- Adjust Placements: Move ads to high-traffic areas, avoiding clutter.
- Review Ads: Use the Ad Review Center to block irrelevant or low-performing ads.
- Boost Traffic: Optimize content with AllinOneSEOOnline’s keywords suggestion tool to attract more visitors, as detailed in their WordPress SEO guide.
- Check Site Health: Use AllinOneSEOOnline’s google malware checker to ensure your site is secure.
Step 7: Additional Tips for 2025
- Mobile Optimization: With mobile traffic dominating, ensure ads are responsive using AllinOneSEOOnline’s webpage screen resolution simulator.
- Avoid Invalid Traffic: Monitor traffic sources with AllinOneSEOOnline’s suspicious domain checker to prevent penalties.
- Diversify Revenue: Combine AdSense with affiliate marketing or sponsored content, as explored in AllinOneSEOOnline’s Studypool tutor guide.
- Build Backlinks: Increase traffic with AllinOneSEOOnline’s backlink maker, per their backlink guide.
Industry Trends in 2025
In 2025, Google’s focus on user privacy and AI-driven advertising shapes AdSense strategies. The 2024 Helpful Content Update emphasizes high-quality content, while AI optimizes ad relevance. Privacy regulations like GDPR and CCPA require robust consent mechanisms, and mobile-first indexing prioritizes responsive design, per Search Engine Journal.